How to Set Up Google Analytics and Google Search Console in WordPress
A Step-by-Step Guide to Installing Google Analytics 4 (GA4) with Google Site Kit

Jan
A Step-by-Step Guide to Installing Google Analytics 4 (GA4) with Google Site Kit
This comprehensive guide, tailored for intermediate to advanced WordPress professionals, developers, and site owners, will walk you through every essential step. From creating your new GA4 property to verifying data collection and leveraging its advanced insights, you’ll gain the definitive knowledge to empower your website with the next generation of analytics. Prepare to effortlessly integrate GA4, understand its event-driven architecture, and unlock deeper insights for smarter decision-making, ensuring your digital strategy remains ahead of the curve.
The Imperative Shift to GA4: Why Now?
The digital analytics world is constantly advancing, and staying current is non-negotiable for accurate insights. The shift to GA4 is not merely an option; it’s a requirement driven by significant changes in technology, user behavior, and privacy regulations.
Understanding the End-of-Life for Universal Analytics (UA)
For years, Universal Analytics served as the backbone for countless websites, providing valuable insights into traffic and user interactions. However, UA’s measurement model, built around sessions and page views, struggles to adapt to today’s complex, multi-device user journeys. Google officially ceased processing new data in standard UA properties on July 1, 2023, making migration to GA4 an urgent necessity. Continuing to rely on UA will mean a complete absence of new data, rendering your historical insights increasingly obsolete and your future strategies uninformed.
Key Advantages of GA4: A Paradigm Shift in Analytics
GA4 introduces a revolutionary **event-based data model**, moving beyond page views to focus on every user interaction as a distinct event. This fundamental change provides a more holistic and accurate view of the user journey across various platforms and devices. Beyond this, GA4 offers:
- **Enhanced Privacy Controls:** Built with privacy in mind, GA4 offers cookieless measurement and more robust data governance options.
- **Cross-Platform Tracking:** Seamlessly tracks users across websites and mobile apps, unifying data for a comprehensive understanding.
- **AI-Powered Insights:** Leverages machine learning to uncover predictive insights, identify trends, and even forecast user behavior.
- **Focus on User Journeys:** Emphasizes user engagement and lifecycle metrics, offering a clearer picture of how users interact with your content over time.
The Role of Google Site Kit in Simplifying Complex Integrations
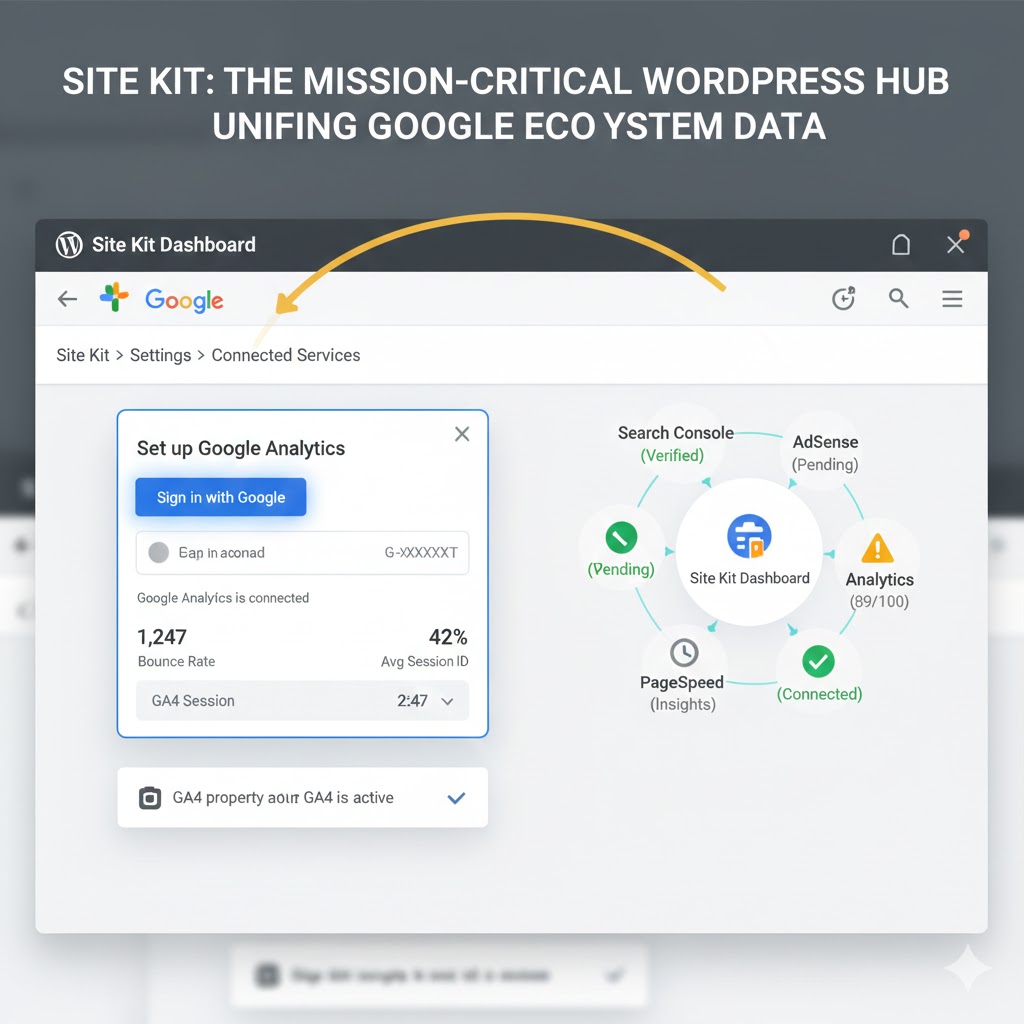
For WordPress users, the perceived complexity of integrating new analytics platforms can be a barrier. This is precisely where **Google Site Kit** shines. As Google’s official WordPress plugin, Site Kit acts as a central hub, simplifying the connection between your WordPress site and essential Google services like Search Console, AdSense, PageSpeed Insights, and, critically, Google Analytics. It eliminates the need for manual code snippets, theme modifications, or third-party plugins, making powerful analytics accessible to every WordPress site owner, regardless of their technical proficiency.
Pre-Installation Checklist: Essential Preparations
Before diving into the installation process, a few foundational elements must be in place. Ensuring you meet these requirements will guarantee a smooth and error-free setup of GA4 through Google Site Kit.

An Active Google Account: Your Centralized Hub
The cornerstone of integrating any Google service is a robust Google Account. This should be the same account you use to manage your existing Google Analytics properties, Google Search Console, or any other Google services pertinent to your website. This centralized access ensures seamless authentication and permission management, allowing Site Kit to securely connect your WordPress site to your GA4 property.
A Self-Hosted WordPress Website: The Foundation
Google Site Kit is exclusively designed for **self-hosted WordPress websites** (WordPress.org installations). While WordPress.com offers various plans, Site Kit’s full functionality is optimized for environments where you have complete control over your site’s files and database. Ensure your WordPress installation is up-to-date to benefit from the latest security patches and feature compatibility.
Administrator Access to Your WordPress Dashboard: The Key to Control
To install plugins, activate services, and grant necessary permissions, you must have **administrator-level access** to your WordPress dashboard. This elevated privilege allows you to make system-wide changes, which are essential for integrating Google Site Kit and subsequently connecting your GA4 property. Verify your user role before beginning the installation process.
The Scale of WordPress: Why Seamless Integration is Crucial
Understanding the vastness of the WordPress ecosystem underscores the importance of streamlined integration solutions like Google Site Kit. **Over 43% of all websites globally are powered by WordPress**, making seamless integration crucial for a vast user base. This statistic highlights why Google has invested in a dedicated plugin like Site Kit, recognizing the need to simplify powerful analytics tools for the platform’s extensive community.
Step 1: Seamless Installation and Activation of Google Site Kit
The first critical step in connecting GA4 is to install and activate Google Site Kit. This process is similar to adding any other plugin to your WordPress site but involves an initial setup wizard to connect your Google Account securely.
Navigating to Your WordPress Dashboard: Plugins Section
Begin by logging into your WordPress administrator area. From the main dashboard, navigate to the sidebar menu. Hover over “Plugins” and then click on **”Add New”**. This action will take you to the WordPress plugin repository, where you can search for and install new plugins.
Searching for “Google Site Kit” and Initiating Installation
In the search bar provided on the “Add New Plugin” page, type **”Google Site Kit”**. The official plugin, developed by Google, will typically appear as the first result. Look for the plugin with the Google logo and the description “Site Kit by Google – The official WordPress plugin for insights on how people find and use your site.” Click the **”Install Now”** button next to it. Once installed, the button will change to “Activate.” Click **”Activate”** to enable the plugin on your site.
Activating the Plugin and Starting the Initial Setup Wizard
Upon activation, Google Site Kit will automatically redirect you to its initial setup page, or you can find its new menu item in your WordPress dashboard sidebar. Click **”Start Setup”** to initiate the wizard. This guided process is designed to walk you through the essential connections needed for Site Kit to function correctly.
Connecting Your Google Account and Granting Necessary Permissions
The setup wizard will prompt you to connect your Google Account. This is the same account you confirmed in the pre-installation checklist. Click **”Sign in with Google”** and follow the prompts to select your account. You will then be asked to grant Site Kit various permissions to access your Google services (e.g., Google Search Console, Google Analytics). Carefully review these permissions and click **”Allow”** for each one. These permissions are crucial for Site Kit to fetch data and configure services on your behalf securely. Once connected, Site Kit will verify your site ownership, a process often handled automatically if your Google Account already owns the domain in Search Console.
Step 2: Connecting Google Analytics within Site Kit’s Ecosystem
With Google Site Kit successfully installed and your Google Account connected, the next step is to integrate Google Analytics. This process allows Site Kit to manage your GA4 property directly from your WordPress dashboard, simplifying data collection.
Accessing the Google Site Kit Dashboard
After the initial setup, you can access the Google Site Kit dashboard directly from your WordPress admin area. In your sidebar menu, you’ll see a new entry labeled **”Site Kit”**. Click on it to navigate to the main dashboard. This central hub provides an overview of your connected Google services and relevant data.
Locating the “Analytics” Module and Clicking “Connect Service”
Within the Site Kit dashboard, scroll down to find the section dedicated to Analytics. If you haven’t connected it yet, you’ll see a prompt to set it up. Click the **”Connect Service”** button associated with Google Analytics. This action will initiate the process of linking your GA4 property.
Allowing Site Kit to Access Your Google Analytics Data
Site Kit will then guide you through authorizing access to your Google Analytics data. Because you’ve already linked your Google Account in Step 1, this step is often seamless. You might be asked to confirm your account again and grant specific permissions related to Analytics. This allows Site Kit to read your existing GA4 properties, create new ones if necessary, and inject the correct GA4 tracking code (the gtag.js snippet) onto your WordPress website without requiring manual intervention.
The Power of Integrated Services: Faster Growth, Deeper Insights
Connecting analytics through a unified platform like Site Kit is not just about convenience; it directly impacts your site’s growth potential. **Websites that actively use analytics for decision-making report 2x faster growth in traffic and conversions compared to those that don’t.** This statistic underscores the profound benefit of having your analytics seamlessly integrated and easily accessible, enabling faster, data-driven optimizations.
Step 3: Creating or Selecting Your GA4 Property – A Guided Process
This is a pivotal step where Site Kit intelligently detects your existing analytics setup and guides you toward creating a new GA4 property or connecting an existing one. Understanding this flow is crucial for a successful migration.
Site Kit’s Intelligent Detection and Workflow Adaptation
Upon connecting the Analytics service, Site Kit performs an intelligent scan of your linked Google Analytics account. It determines whether you already have an active GA4 property associated with your website, or if you’re primarily using Universal Analytics (UA) or have no analytics configured at all. This adaptive workflow ensures you’re guided down the most appropriate path.
Handling Existing UA vs. Creating a New GA4 Property
- **If you have an existing GA4 property:** Site Kit will prompt you to select it from a dropdown list of your available Google Analytics properties. Ensure you choose the correct GA4 property (distinguished by its “G-XXXXXXX” ID).
- **If you only have Universal Analytics (or no Analytics):** Site Kit will expertly guide you through creating a new GA4 property directly within the setup flow. This is one of Site Kit’s most valuable features, as it bypasses the need to manually navigate the GA4 interface. It will often create a new Web Data Stream automatically for your WordPress site, ensuring immediate data collection setup.
Understanding the GA4 Property ID (G-XXXXXXX) and Data Streams
Every GA4 property has a unique identifier, known as the **Measurement ID**, which starts with “G-” followed by a series of alphanumeric characters (e.g., G-ABCDEFG123). This ID is what Site Kit uses to connect your website to the correct GA4 data collection endpoint. It’s imperative that the correct Measurement ID is selected or generated. Furthermore, within GA4, your website is considered a “web stream” – one of potentially multiple data sources (web, iOS app, Android app) feeding data into a single GA4 property. Site Kit handles the creation of this web stream automatically when creating a new property, ensuring your website data is correctly configured to flow into GA4.
Step 4: Verifying Your GA4 Installation for Accurate Data Collection
Installation is only half the battle; verification is critical to confirm that your GA4 property is actively collecting accurate data. Skipping this step can lead to significant blind spots in your analytics.

Checking the Site Kit Dashboard for Confirmation
After completing Step 3, return to your Google Site Kit dashboard in WordPress. Within the Analytics section, Site Kit will provide a clear confirmation message indicating that GA4 is connected and actively collecting data. It may also show initial aggregated data, though for real-time verification, you’ll need to go directly to the GA4 interface.
Using Google Analytics’ Realtime Report for Instant Feedback
The most immediate and effective way to verify your GA4 installation is through its Realtime report. Follow these steps:
- Navigate to your GA4 interface by visiting analytics.google.com.
- Once logged in, select your GA4 property from the property selector.
- In the left-hand navigation menu, go to **Reports > Realtime**.
This report provides near-instantaneous data on active users on your site within the last 30 minutes.
Visiting Your Website in an Incognito Browser Tab or from Your Phone
To see your own visit register in the Realtime report, open your website in a new **incognito or private browser tab**, or visit it from your mobile device. Browse a few pages, click on some elements, and then observe the GA4 Realtime report. You should see your active user count increase, and events like ‘page_view’ and ‘scroll’ (among others) should begin to appear, confirming that data is successfully being sent from your site to GA4.
The Critical Role of Verification: Ensuring Data Integrity
Verifying your installation is a non-negotiable step. Without it, you cannot be certain that your analytics setup is functioning correctly, potentially leading to lost or inaccurate data. **90% of successful digital marketing campaigns leverage accurate and real-time data insights, making verification a critical step.** Ensuring your data integrity from the outset sets the stage for informed decision-making and optimal campaign performance.
Troubleshooting Common GA4 Installation Issues: Expert Solutions
Even with streamlined tools like Site Kit, occasional issues can arise. Knowing how to diagnose and resolve common GA4 installation problems is essential for maintaining data flow.

Data Not Appearing in GA4: Caching, Conflicts, and ID Verification
If you’ve followed all steps but data isn’t showing in your GA4 Realtime report, consider these common culprits:
- Caching Plugins: WordPress caching plugins (e.g., WP Rocket, LiteSpeed Cache) can sometimes prevent the GA4 tracking script from loading immediately. **Clear your site’s cache** completely after installation.
- Potential Plugin Conflicts: While rare with Site Kit, another plugin might be interfering with script injection. Temporarily deactivate other plugins one by one (starting with any other analytics or script management plugins) to identify conflicts.
- Incorrect GA4 Property ID (G-XXXXXXX): Double-check that the correct GA4 Measurement ID is selected in Site Kit. Even a single character difference will prevent data collection.
- Duplicate Tracking Codes: Ensure you haven’t manually added GA4 code elsewhere (e.g., theme settings, another plugin). Site Kit handles the injection, and duplicates can cause inflated or erroneous data.
Site Kit Connection Errors: Revoking Permissions and Re-Connecting
If Site Kit itself displays connection errors or fails to link with your Google Account or Analytics service:
- Revoke Site Kit Permissions: Go to your Google Account settings (myaccount.google.com/connections). Find “Site Kit by Google” under “Third-party apps with account access” and revoke its access.
- Re-connect the Plugin: Return to your WordPress dashboard, navigate to Site Kit, and attempt the setup process again. This often resolves authentication token issues.
Ad-Blockers Impacting Data Collection: A Note on Testing
It’s important to be aware that during your own testing, browser ad-blockers or privacy extensions can sometimes prevent analytics scripts from loading. This can lead to your own visits not registering in the Realtime report. While this is normal for your testing environment, it’s crucial to understand that it doesn’t mean GA4 isn’t working for your general audience. When verifying, ensure you temporarily disable ad-blockers or use an incognito window specifically for testing purposes.
Beyond Installation: Unleashing the Power of Your GA4 Data
With GA4 successfully installed and verified, the true journey of data-driven optimization begins. Understanding where to start and what to look for will empower you to transform raw data into actionable insights.

Key Reports to Explore Immediately: Your Initial Data Dive
GA4’s interface is different from UA, focusing on user-centric reports. Once data starts flowing, dive into these essential reports:
- Realtime: For immediate activity and verification (as used in Step 4).
- Engagement: Understand how users interact with your content (page views, scrolls, session duration, engaged sessions).
- Monetization: If you have e-commerce, track purchases, revenue, and product performance.
- Demographics & Tech: Get insights into your audience’s age, gender, location, and the technology they use to access your site.
These reports provide a solid foundation for understanding your initial user behavior trends.
Understanding the Event-Based Data Model: A Fundamental Rethink
The core of GA4 is its event-based data model. Every user interaction—from a page view (‘page_view’) to a button click (‘click’), a video play (‘video_start’), or a scroll (‘scroll’)—is treated as an event. This model offers unparalleled flexibility and depth:
- You track precisely what users do, not just where they go.
- It enables consistent data collection across various platforms (web and app).
- It provides a more granular view of the user journey, allowing for deeper analysis of specific interactions.
Embrace this shift; it’s the key to unlocking GA4’s full potential.
Setting Up Conversions and Custom Events to Track Specific Goals
While GA4 automatically collects many standard events, your website likely has unique goals. This is where **conversions** and **custom events** come in. You can mark any event (standard or custom) as a conversion within the GA4 interface. For example, a “form_submit” event could be marked as a conversion to track lead generation. For more advanced tracking of specific button clicks or unique interactions not covered by enhanced measurement, you can implement custom events. While Site Kit handles basic GA4 integration, **Google Tag Manager (GTM)** is often the preferred tool for implementing complex custom events and conversions without modifying your website’s code directly.
Leveraging Advanced Insights for Optimized Digital Marketing
The wealth of data within GA4, especially when combined with its machine learning capabilities, offers significant opportunities for optimization. **Businesses using advanced analytics tools like GA4 report up to a 10% increase in ROI from their digital marketing efforts due to data-driven optimization.** By meticulously analyzing user behavior, identifying drop-off points, and understanding conversion paths, you can refine your content strategy, improve user experience, and ultimately achieve higher conversion rates and better ROI.
Conclusion: Streamlined Analytics for Smarter Websites
The transition to Google Analytics 4 is a critical step for any website owner seeking to remain competitive and data-informed in the modern digital landscape. As we’ve meticulously detailed, what might appear as a complex migration is effortlessly streamlined through the power of **Google Site Kit**. This official WordPress plugin transforms the daunting task of integrating GA4 into a few intuitive, step-by-step actions, making advanced analytics accessible to even the busiest site owner.
By leveraging Site Kit, you not only ensure your data collection is future-proofed against the deprecation of Universal Analytics but also gain immediate access to GA4’s transformative event-driven architecture, cross-platform insights, and AI-powered intelligence. The ability to create new GA4 properties, connect existing ones, and verify data collection with such ease is a testament to Site Kit’s design, directly empowering you to understand user behavior with unprecedented depth.
We’ve covered the imperative shift to GA4, detailed the essential pre-installation checklist, walked through each installation and connection step with Site Kit, provided crucial verification methods, and offered expert solutions for common troubleshooting scenarios. Furthermore, we’ve outlined how to move beyond basic installation, encouraging you to delve into GA4’s rich reports, embrace its event-based model, and configure custom conversions that align with your unique business objectives.
The definitive advice for all WordPress professionals and site owners is clear: **Embrace GA4 now and make Google Site Kit your primary tool for seamless integration.** The insights you gain will not only inform your content, marketing, and user experience strategies but will also provide a robust foundation for continuous website performance improvement and the sustained achievement of your digital goals. Don’t merely collect data; leverage it to build smarter, more engaging, and ultimately more successful websites.
FAQs: Your GA4 Installation & Site Kit Questions Answered
Q: Can I run Universal Analytics (UA) and GA4 simultaneously on my site?
A: Yes, it’s highly recommended to run both during the transition period until UA is fully deprecated. Google Site Kit can configure both if they exist in your Analytics account, ensuring you maintain historical UA data while building up your GA4 data set.
Q: Do I need a Google Tag Manager account to use GA4 with Site Kit?
A: No, Site Kit directly integrates GA4 without requiring Google Tag Manager for basic data collection (page views, enhanced measurement events). Google Tag Manager (GTM) can be integrated later for more advanced tracking, complex custom event setup, and managing multiple marketing tags, but it is not a prerequisite for Site Kit’s core GA4 functionality.
Q: How long does it take for data to appear in GA4 after installation?
A: Realtime data should appear almost instantly (within seconds to a couple of minutes) after installation and verification. Other standard reports within GA4 might take a few hours (typically 4-8 hours, but up to 24-48 hours in some cases) to fully process and populate.
Q: What if I already have Google Analytics installed manually (e.g., via a theme or another plugin)?
A: Site Kit can often detect existing installations. If you’re switching to Site Kit as your primary analytics tool, ensure you remove any duplicate tracking codes (e.g., from your theme’s custom code area or another analytics plugin). Running multiple identical GA4 tracking codes can lead to skewed, inflated, or inaccurate data.
Q: Is Google Site Kit free?
A: Yes, Google Site Kit is a free WordPress plugin provided directly by Google. It offers robust integration with various essential Google services including Search Console, Analytics, AdSense, and PageSpeed Insights, all at no cost.